ROP Emporium : Ret2Win
Hey folks!
Sorry for not posting for a long while been busy with exams back to the topic, I have been tempted from a long while to start with pwn and after doing some basic stuff I planned to do ROP Emporium so today we are going to start with the very basic challenge called "Ret2Win"!
Download the binary from :- https://ropemporium.com/challenge/ret2win.html
SO before with start with dissecting the binary it would make a whole lot of sense to see even if we need to go for "ROP" based attack or not, which is basically done when the binary is having "NX" bit enable, so what's "NX?"
Think of it as, when we do a Buffer-Overflow we are trying to access some parts of memory that's not meant to be accessed (in the way that we are trying), so it basically it makes those pages of memory un-executable by marking "Allow" and "Disallow". It might be overwhelming to take, if you are having a hard time keeping up think of NX as a protective measure to make Buffer-Overflow harder, so enough about "NX" how to check if the NX is enabled or not?
For this and further dwelling into the binary exploitation we will be using something called a "Debugger", we are going to use "GDB" (inbuilt most of the linux distro), before we start it's highly recommended to get "PEDA" or "GEF" to make life easier!
PEDA (Python Exploit Development Assistant) is like an add-on to make life easier how we will see as we progress!
GEF (This is a enhanced version of GDB, which I will be using)
You can also use "radare2" in place of GDB or maybe something called "Binary Ninja" to keep things easy and understandable without overloading your brains with weird commands we are going to use GDB
PEDA :- https://github.com/longld/peda
GEF :- http://gef.readthedocs.io/en/master/
So we have discussed the tools, now let's get into the action! so how to find the "NX" bit? we execute checksec (built-in command inside PEDA and GEF)
To load a binary in gdb we do "gdb filename", I used gdb -q for quite so I get to see less stuff!
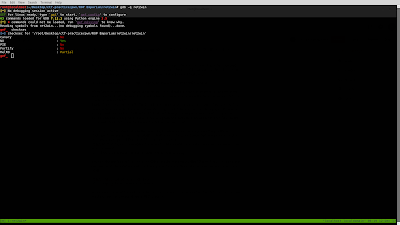 SO we can see NX is enable, don't worry about other stuff we will see all of those as we progress!
I always try to look up the functions once I load the binary in the debugger, so let's give it a try!
 After examining the functions I think the functions that are useful for us is pwnme and ret2win, let's try to calculate the buffer size now... but before that we need to "break * main" what it does is simply put a break point on the main section so that we can examine stack before and after the input, to calculate the stack size I will be using something called pattern create, let's go for a pattern create 500


Sorry for not posting for a long while been busy with exams back to the topic, I have been tempted from a long while to start with pwn and after doing some basic stuff I planned to do ROP Emporium so today we are going to start with the very basic challenge called "Ret2Win"!
Download the binary from :- https://ropemporium.com/challenge/ret2win.html
SO before with start with dissecting the binary it would make a whole lot of sense to see even if we need to go for "ROP" based attack or not, which is basically done when the binary is having "NX" bit enable, so what's "NX?"
Think of it as, when we do a Buffer-Overflow we are trying to access some parts of memory that's not meant to be accessed (in the way that we are trying), so it basically it makes those pages of memory un-executable by marking "Allow" and "Disallow". It might be overwhelming to take, if you are having a hard time keeping up think of NX as a protective measure to make Buffer-Overflow harder, so enough about "NX" how to check if the NX is enabled or not?
For this and further dwelling into the binary exploitation we will be using something called a "Debugger", we are going to use "GDB" (inbuilt most of the linux distro), before we start it's highly recommended to get "PEDA" or "GEF" to make life easier!
PEDA (Python Exploit Development Assistant) is like an add-on to make life easier how we will see as we progress!
GEF (This is a enhanced version of GDB, which I will be using)
You can also use "radare2" in place of GDB or maybe something called "Binary Ninja" to keep things easy and understandable without overloading your brains with weird commands we are going to use GDB
PEDA :- https://github.com/longld/peda
GEF :- http://gef.readthedocs.io/en/master/
So we have discussed the tools, now let's get into the action! so how to find the "NX" bit? we execute checksec (built-in command inside PEDA and GEF)
To load a binary in gdb we do "gdb filename", I used gdb -q for quite so I get to see less stuff!

I always try to look up the functions once I load the binary in the debugger, so let's give it a try!


Basically what "pattern create 500" did is it made a unique string of length 500 so that whenever the buffer-overflows we can find the place according to the pattern
Let's run the Binary now by "r"

Don't be overwhelmed by so many assembly instructions at this point i would advice you to ignore everything just focus on the reason "BREAKPOINT" and $rip : 0x0000000000400746 <main+0> push rbp, so we can see the main starts and the moment it start there's a break-point remember "break * main" and rip tells you about the current instruction on the stack which is basically what we want to manipulate in most of the cases...
Let's continue by "c" and it asks for the user-input let's pass in the 500 char that we got from (pattern create) and see what happens!

When you pass in the 500 characters it SEGFAULTS it means the memory is trying to access some address that's not allowed and interrupt is issued by the MMU , in simple terms we overflow the buffer to an address which isn't allowed so there's an interrupt issued to stop the execution so how will we find the size by this? notice the RIP $rip : 0x0000000000400810 _ <pwnme+91> ret
it's telling the binary to go to return address that's what we will alter to "ret2win" to get the flag, now to find the address we will use another inbuilt function called "pattern search" notice the $rsp : 0x00007fffffffe088 _ "faaaaaaag" so that "faaaaaaag" is the pattern that we need to search in the string let's see what happens next....

so now we can see that buffersize is 40 which is nothing but "offset" in the image above, so how I know what to search ? well if you look at the registers (RAX/RIP/RDI etc) you can see that ending sequence is always "faaaaaaag" so that's how I know what's the end of the string that we need to find, I think this makes a lot more sense why "UNIQUE" string was created and how the pattern is matched, so now we have all the information we need to make the exploit script!

This is how the exploit script looks like what we did is passed in some garbage value "x" * 40 and appended the return address at the end to ret2win so that RIP goes to ret2win instead of going to return address, the address is written in reversed order due to endianess (the computer reads the address in reverse order), so now this makes sense when you saw "Endianess in the offset screenshot". Let's see this in action!

So there we go! We got the flag:ROPE{a_placeholder_32byte_flag!}
So that was it for this one, I'll be doing the next challenge in this series soon and do this one with something called "PwnTools" too! Make sure you don't miss it.
Thank You!!


Comments
Post a Comment